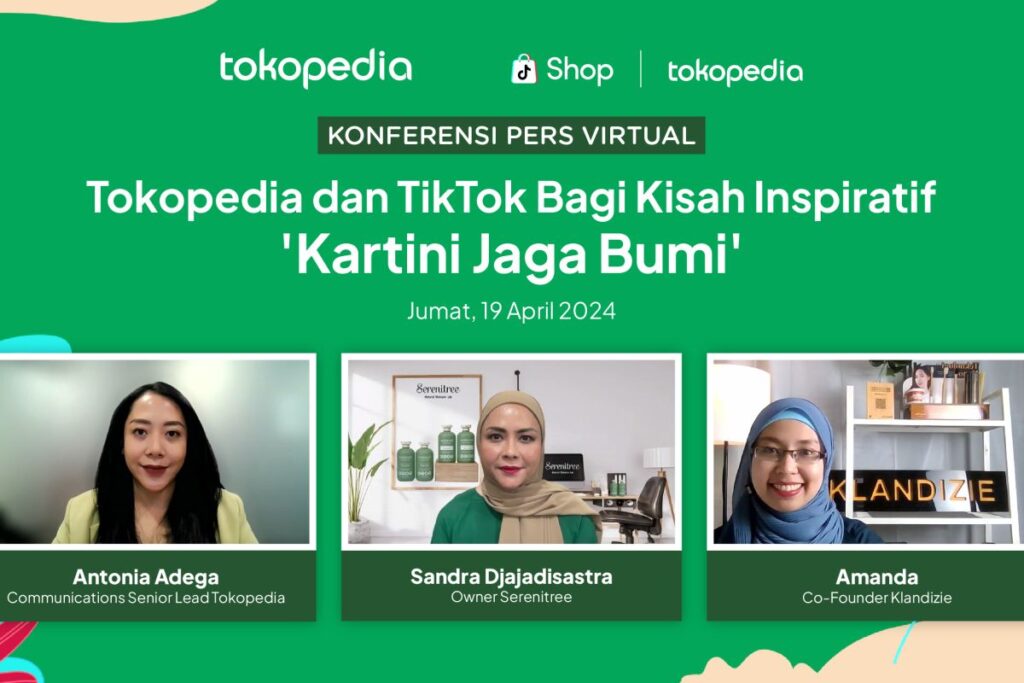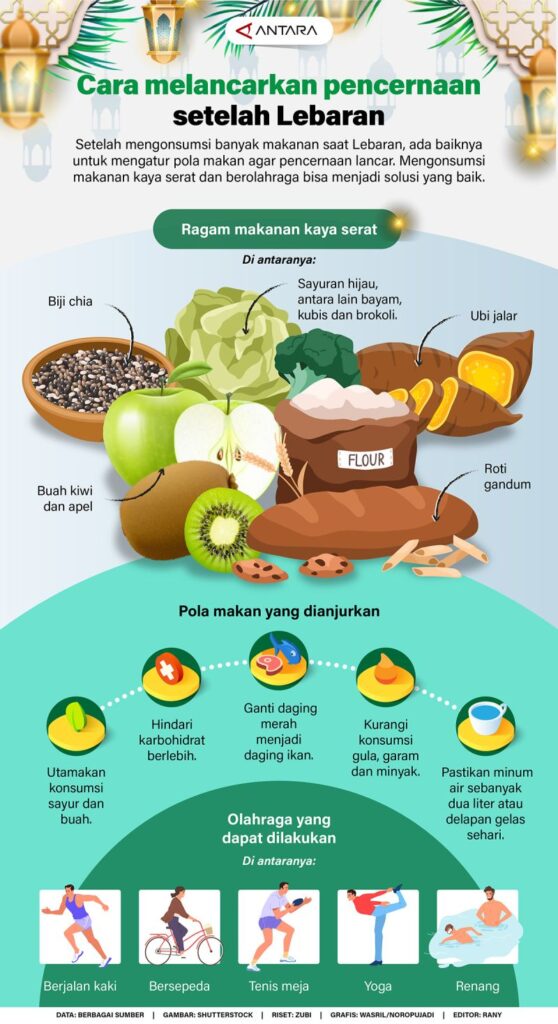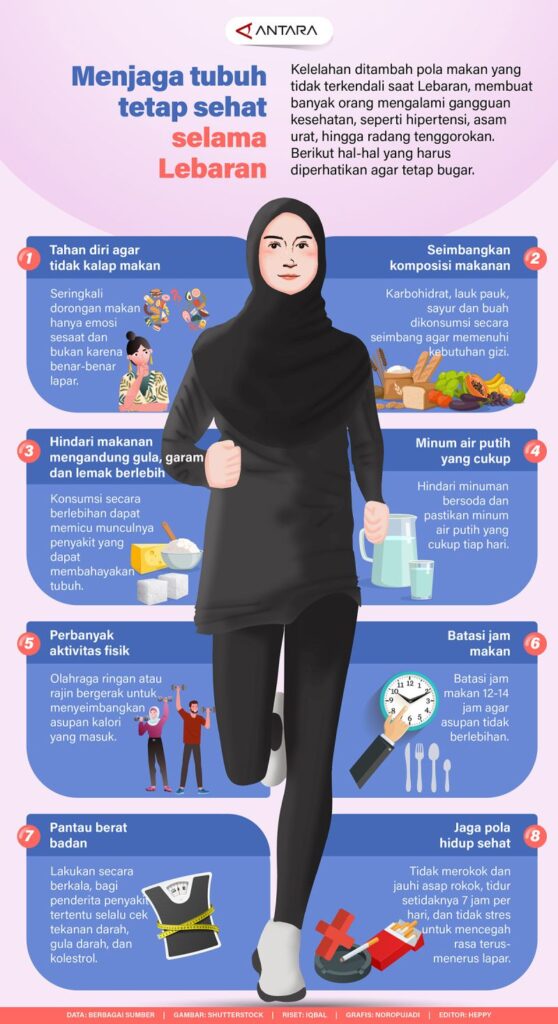
Pokemon, franchise permainan dan serial animasi yang sangat populer di seluruh dunia, telah mengeluarkan edisi khusus batik di Indonesia. Edisi khusus ini merupakan bagian dari upaya Pokemon untuk merayakan budaya dan tradisi Indonesia yang kaya akan keindahan batik.
Batik, kain tradisional Indonesia yang dihargai karena keindahannya dan proses pembuatannya yang rumit, telah menjadi simbol kebanggaan bagi masyarakat Indonesia. Dengan mengeluarkan edisi khusus batik, Pokemon menghormati kekayaan budaya Indonesia dan mencoba untuk memperkenalkan keindahan batik kepada para penggemarnya di seluruh dunia.
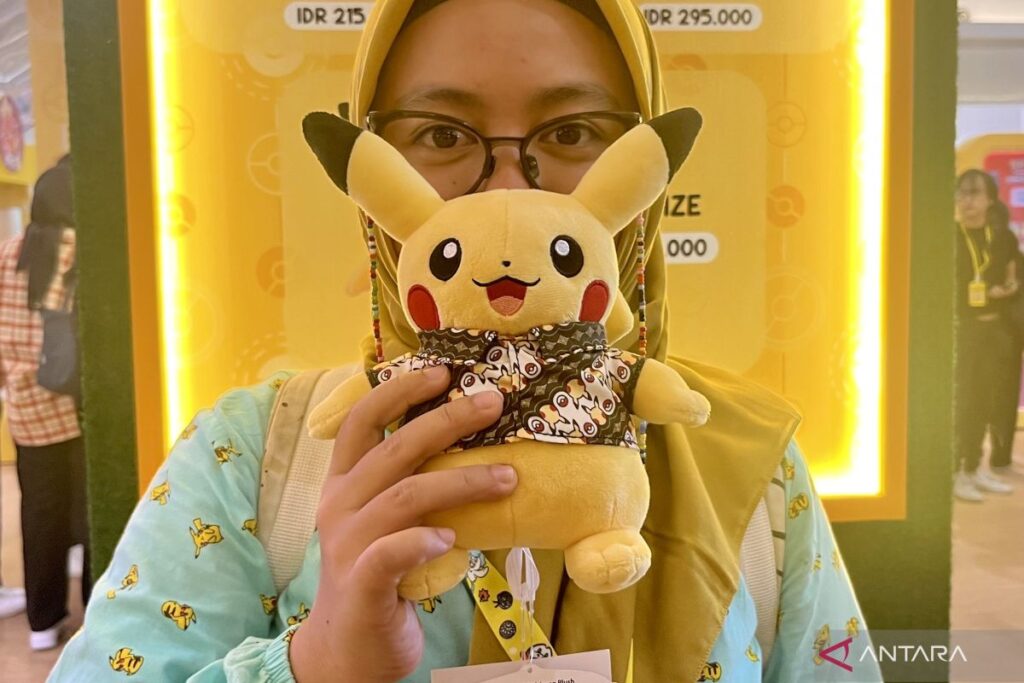
Edisi khusus batik ini mencakup berbagai macam merchandise Pokemon, seperti boneka, pakaian, dan aksesori, yang dihiasi dengan motif batik yang indah dan unik. Setiap motif batik yang digunakan dalam edisi khusus ini memiliki makna dan filosofi tersendiri, dan diharapkan dapat menjadi sarana untuk memperkenalkan kekayaan budaya Indonesia kepada dunia.
Para penggemar Pokemon di Indonesia amat antusias dengan peluncuran edisi khusus batik ini. Mereka merasa bangga bahwa Indonesia diakui oleh Pokemon sebagai negara yang kaya akan budaya dan tradisi. Selain itu, mereka juga berharap bahwa dengan adanya edisi khusus batik ini, keindahan dan keunikan batik Indonesia dapat semakin dikenal dan diapresiasi oleh masyarakat dunia.
Diharapkan bahwa dengan adanya edisi khusus batik ini, kerjasama antara Pokemon dan Indonesia dapat terus berkembang dan menghasilkan produk-produk yang menggabungkan keindahan budaya Indonesia dengan daya tarik global dari franchise Pokemon. Hal ini tidak hanya akan memperkuat hubungan antara Indonesia dan Pokemon, tetapi juga akan menjadi langkah positif dalam mempromosikan kekayaan budaya Indonesia kepada dunia. Semoga edisi khusus batik ini dapat menjadi kesuksesan dan menjadi inspirasi bagi kolaborasi budaya yang lebih luas di masa depan.